A high resolution digital image is created or prepared at the start of the digital printing process, and the printed output is finished at the conclusion. Depending on the substrate material (paper, cloth, or plastic) and printer type (inkjet or laser), the precise procedures may change.
The general digital printing workflow
1. Prepress and design
Create or upload a design: A digital file produced by a designer or supplied by a client initiates the process.
Get the file ready: To guarantee that the image will be faithfully represented on the finished print, this entails cropping the picture, correcting any digital flaws, and fixing the colours.
Save in a print-ready format: To prevent quality loss, the file is saved in a high-resolution format, often at 300 dots per inch (dpi). Usually, it is changed to the CMYK colour model, which is the printing industry standard.
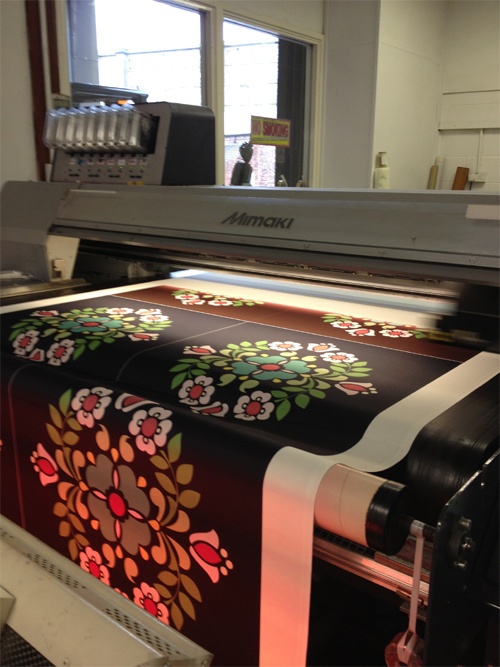
2. Printing
- Transfer the file to the press: To avoid the requirement for printing plates, the final, authorised digital file is delivered straight to the digital printing press.
- Use the picture: The ink or toner is applied directly to the substrate by the printer.
- Inkjet printing: To reproduce the design, tiny droplets of liquid ink are sprayed onto the material’s surface, where they dry.
- Laser (dry toner) printing: Charged toner particles are applied to the material by the printer via an electrostatic technique. The toner is subsequently fused to the surface using heat.
3. Post-press and finishing
Cure the print: In order to permanently establish the colours in some materials and inks, such as those used in textile printing, the print needs to be cured. Usually, steam or heat are used for this.
Execute quality control by checking the final product for errors and making any required corrections. When placing large orders, this step is very crucial.
Complete the product: The printed material may go through extra finishing steps including cutting, folding, laminating, or binding, depending on the task.
Specific steps for digital textile printing
To guarantee that the colours stick properly, there are a few more stages involved in printing on fabric:
1.Fabric preparation: To improve adherence and stop the ink from spreading, the fabric is frequently pre-treated with chemicals.
2.Printing: Specialized inks are used to print the design onto the ready-made fabric.
3.Fixation: The dyes are permanently bonded to the cloth fibers by heating or steaming the printed fabric.
4.Washing: Before the fabric is dried and packed, it is cleaned to get rid of any extra ink and chemicals.